EasyVista RestAPI
The EasyVista Open Tickets provider uses the EasyVista Rest API to open incidents about your monitoring alerts.
Feature information
| Open ticket | Close ticket (from Centreon to EasyVista) | Handle custom fields |
|---|---|---|
| ✓ | ✓ | ✓ |
Requirements
You need to configure Open Tickets in order for resources (hosts and services) to receive a ticket number.
Network flow
| Source | Destination | Protocol/Port |
|---|---|---|
| Centreon central server | Easyvista | TCP/443 (https) or TCP/80 (http) |
Account
You need the following information:
- Account
- Password or token
The aforementioned account must be able to open a ticket through the /requests API endpoint. The connector will also try to access the following API endpoint depending on the configuration of your open ticket rule:
- /assets
Some test commands that you can run from your Centreon central server are available in the Test commands section.
Account password or token
You can either use:
- an API token,
- or the user password method by setting the Use token to 1 (token will be needed) or 0 (user and password will be used).
Retrieved data
This open ticket connector can retrieve the following information from your EasyVista server:
- Assets
If you need more information regarding retrieved data from an open ticket connector, please read the retrieved data chapter from the Open Ticket global documentation.
Assets
Every information sent to EasyVista comes from Centreon, except of assets. To be able to retrieve them, you will need to use the following syntax in the Filter field of the Lists definition. It must be set as follows: search=field1:value1,field2:value2. For more information please refer to the EasyVista documentation.

Add EasyVista custom fields
EasyVista allows you to create custom fields for your ticket's form. Since they are not standard, Open Ticket will only allow you to manually configure them. This requires a specific syntax and actions. This section will guide you through this configuration.
Add a custom field in the provider configuration
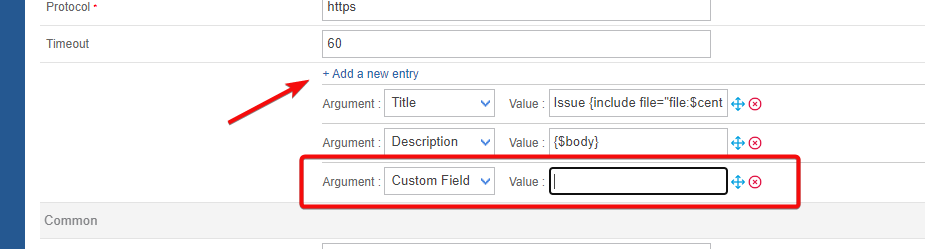
- Add a new Mapping ticket arguments with the + Add a new entry button.
- In the Argument field, select Custom Field.
- In the Value field, enter
{$select.e_<your_field_name>.value}where<your_field_name>must be replaced with the name of your custom field in EasyVista. For example, a city custom field could become {$select.e_city.value}.
- Add a new List for your custom field with the +Add a new entry button.
- In the Id field, you must keep the same syntax than before. So for a e_city custom field, the Id will be e_city.
- In the Label field, enter a meaningful label.
- In the Type field, select Custom.
- The Filters, Mandatory and Sort parameters are optional.

- Add new Custom list definitions for your custom field with the +Add a new entry button. This is where you set up the possible values for your fields.
- In the Id field you must keep the same syntax than before. So for a e_city custom field, the Id will be e_city.
- In the Value field, you usually set the value that will be sent to EasyVista. In the example below, we have set the zip code of each city.
- In the Label field, set a value that is meaningful for your users (or more human-readable). Therefore, in our example, it is going to be name of the city.
- The Default parameter is optional.
As explained in the example below, in the Mapping ticket arguments you could also use {$select.e_<your_field_name>.placeholder} instead of {$select.e_<your_field_name>.value} if you wish to send the name of the city instead of the zip code.

CI parameter
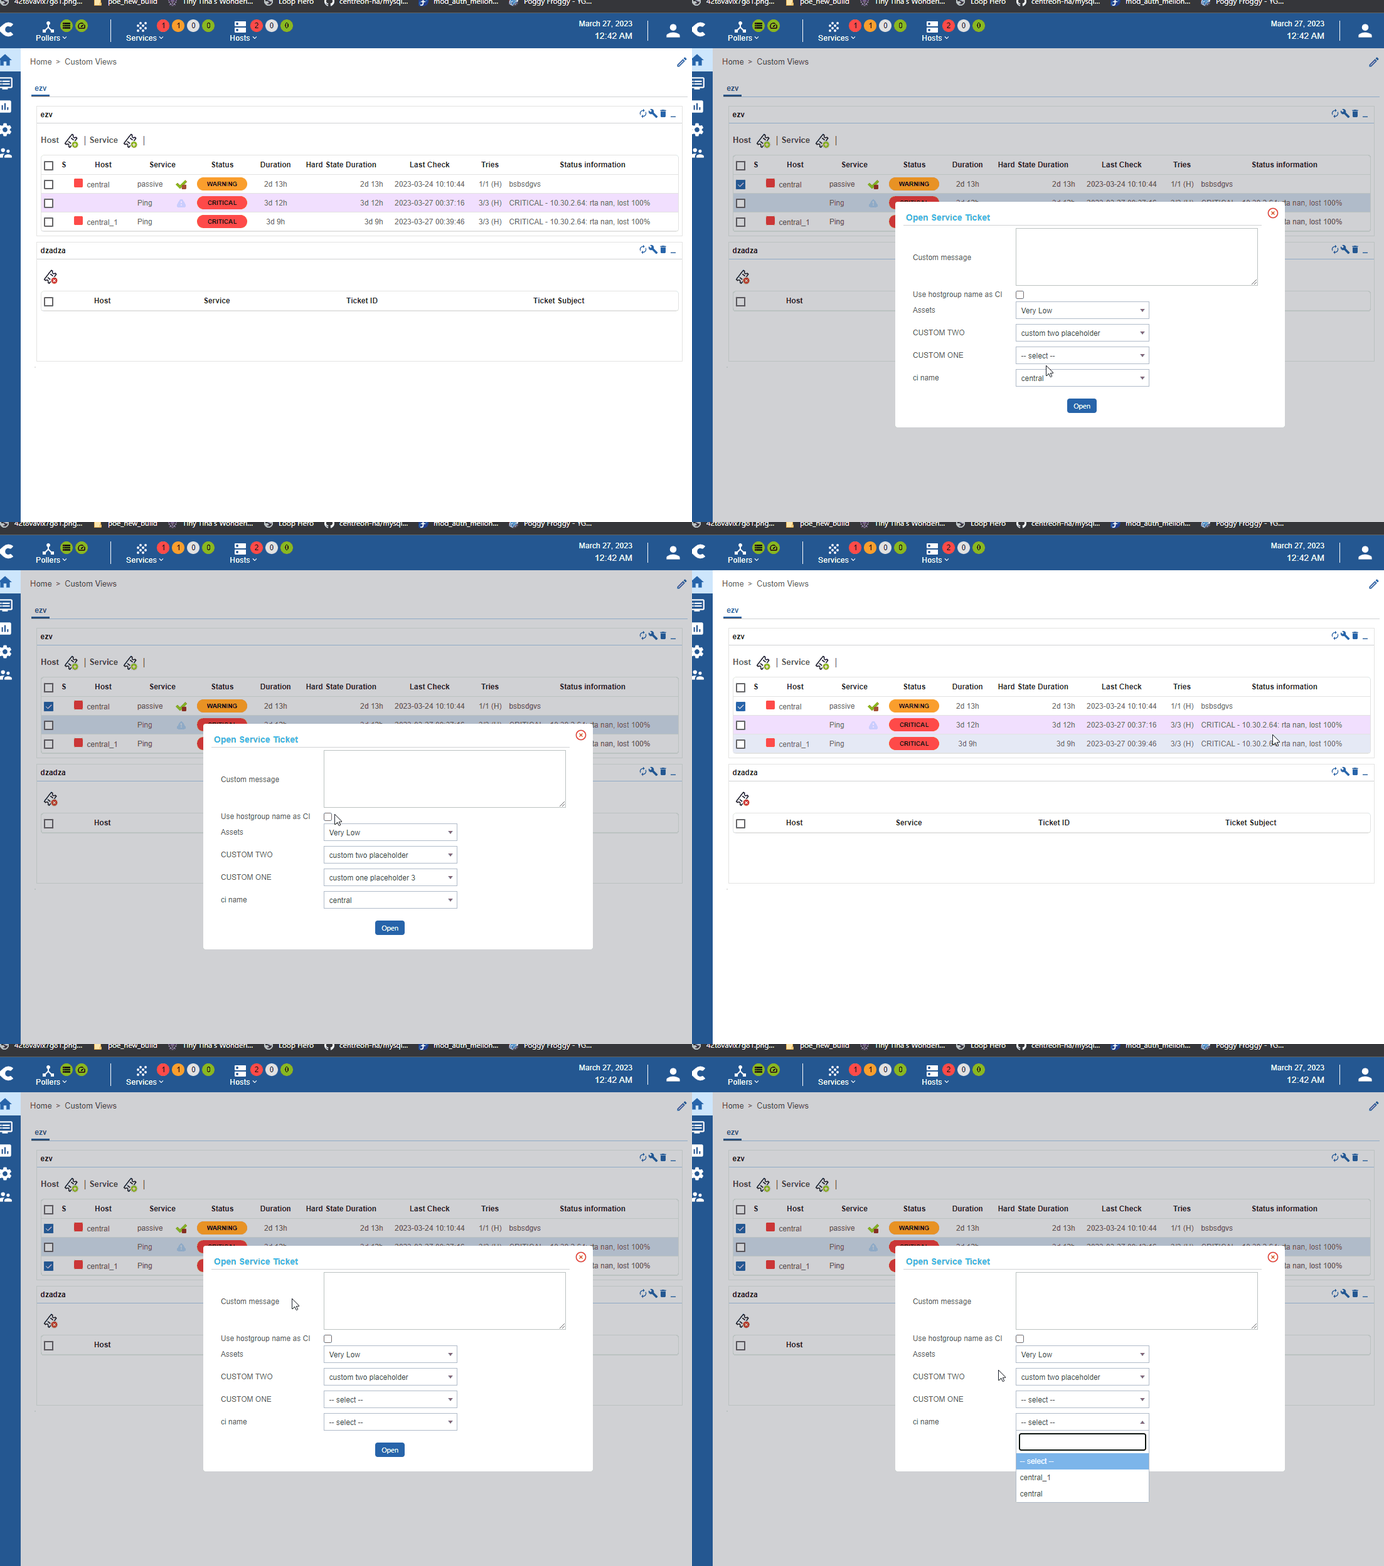
It is possible to send the CI field to EasyVista. When configured (see custom lists for more information) it will send either the name of the host or a selected hostgroup when you tick the "Use hostgroup name as CI" option. When you open a ticket on multiple hosts at once, only groups in which the common hosts belong can be selected. Still in the multiple hosts selection, you will be forced to select one of the host names as CI if you are not using the host group feature.
Test commands
The curl commands listed below must be run from your central server. You need to replace all elements between <> for example <easy_vista_address> may be replaced with my_ezv.local.
If you are using the user/password authentication, replace the --header 'Authorization: Bearer <token>' part with -u '<user>:<password>'.
Open a ticket
curl 'https://<easy_vista_address>/api/v1/requests' \
--header 'Content-Type: application/json' \
--header 'Authorization: Bearer <token>' \
--data '{"requests":[{"catalog_guid:"1234","catalog_code":"1234"}]}'
Close a ticket
curl -X PUT 'https://<easy_vista_address>/api/v1/requests/<ticket_id>' -H
--header 'Content-Type: application/json' \
--header 'Authorization: Bearer <token>' \
--data '{"closed":{}}'
Get EasyVista assets
Without filters:
curl -X GET 'https://<easy_vista_address>/api/v1/assets/?fields=asset_tag,HREF' -H
--header 'Content-Type: application/json' \
--header 'Authorization: Bearer <token>'
With filters:
curl -X GET 'https://<easy_vista_address>/api/v1/assets/?fields=asset_tag,HREF&search=<field>:<value>' -H
--header 'Content-Type: application/json' \
--header 'Authorization: Bearer <token>'